Configure Alert Logic Managed Web Application Firewall (WAF)
When you access the Alert Logic Managed Web Application Firewall (WAF) interface the first time, you must add your websites and test the website proxy. After you configure and test your websites, the test attack registers in the deny log.
Add a website
Open the Add Website page
-
In the Alert Logic console, click the
 Configure menu item, click WAF, and then click the Appliances tab.
 - In the item row of your appliance, click Manage Appliance.
- On the Manage Appliance page, in the left navigation pane, under Services, click Websites.
- On the Websites page, click Add Website.
Modify the virtual web server
By default, WAF deploys as a reverse proxy. Reverse proxy deployments require an IP address to be configured on the appliance. The routing proxy deployment routes traffic to the backend server but intercepts traffic for the configured ports; it then processes traffic and proxies it to the backend. Both deployments terminate client requests and proxy the requests to the backend server.
- On the Add Website page, in the Web Server Protocol list, select one of the following:
- HTTP: Creates a website proxy that responds to HTTP requests.
- HTTPS: Creates a website proxy that responds to HTTPS requests. This will generate a temporary SSL certificate.
- Both: Creates a website proxy that responds to HTTP and HTTPS requests. This will generate a temporary SSL certificate. Click Manage Your SSL Certificates to learn how to upload your own certificate.
- In Web server domain name, type the address of the website you want to protect. This address should be identical to the address users use to view your website in a browser.

- In the Listen IP section, perform one of the following actions to add IP addresses to the Active Listen list:
- Select one or more IPs, and then click Add.

- If the left column lists multiple IP addresses, you can select All Inbound, and then click Add to listen to all IP addresses.

- Select one or more IPs, and then click Add.
- HTTP(S) listen port field, type the port for the website you want listen to. The default ports are as follows:
- HTTP: 80
- HTTPS: 443
- For your first or primary site, select Default Host for listen IP.
When enabled, the virtual host responds to all requests for virtual hosts that are not otherwise configured for this IP address. The procedure in Test your website proxy assumes you selected this option. This configuration is convenient for testing, because it sends any request that is not a policy violation to the backend web server.
Modify the real web servers
- In the Real web server protocol list, select the protocol you want WAF to use to connect to the backend web server. If you want traffic to the backend web server(s) to be encrypted, change the protocol to either http or both (for dual protocol configuration).
- Select Validate real servers.
WAF sends an HTTP request to the backend web server on the port configured to verify that the server is live and responding to HTTP requests. If the server is not yet running, clear the check box.
- In Real server IP or public domain name, type the private IP address or DNS name the web server is listening to.

- In the Port field, type the port the web server is listening to. The default ports are as follows:
- HTTP: 80
- HTTPS: 443
- In the Role list, select one of the following:
- ActiveForwards requests to the backend web server
- Backup: Forwards requests to the backend web server if no other servers are active
- Down: Does not forward requests to the backend web server
Modify the initial configuration section and save changes
- Under Initial configuration, select one of the following configurations to apply to the website proxy:
- WAF Default
- Load Balancer
- Custom
- Template
- Click Save Configuration, and then click Apply changes.
Test your website proxy
After you add a website, test whether WAF can connect to the backend web server. You can also test WAF in Detect mode and Protect mode.
The following walkthrough assumes you have configured your website to be used as the default virtual host for the listen IP. You should also make sure that your website proxy is in Detect mode. You can change these settings after testing.
To set your website proxy to Detect mode, on the Websites page, in the Mode column for the website you want to test, select Detect.
Test Connectivity
In your web browser address bar, type your public IP. The browser should open the default website for your backend web server.
This test will not affect production traffic.
Test Detect mode
To test Detect mode:
- On the Websites page, for the website you want to test, in the Mode column, select DETECT.
- In the browser address bar, type your public IP followed bby /?x=a%00 and press Enter (e.g. 204.110.218.96/?x=a%00).
The browser should open the default website for your backend web server, however, this attack should be registered on the Deny log as a DOS attempt.
View the Deny log
The Deny log lists the attacks on your website proxy. To view the Deny log, in the left navigation pane, click Deny Log.
To view details of any Deny log entry, click the Details icon ( ).
).

Test Protect mode
After you test the connectivity and Detect mode for your website, test the Protect mode.
To test Protect mode:
- On the Websites page, for the website you want to test, in the Mode column, select PROTECT.
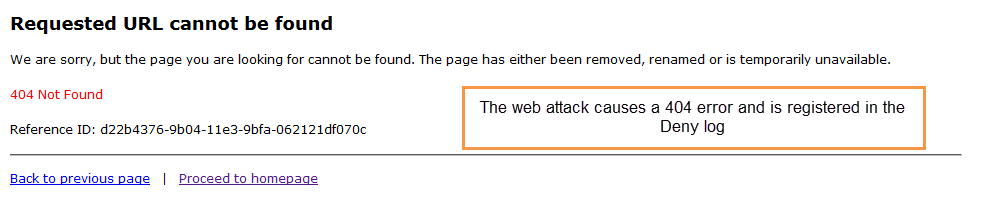
- In the browser address bar, type your public (Elastic) IP followed by /?x=a%00 and press Enter (e.g. 204.110.218.96/?x=a%00).
The browser should show a 404 error message. This attack should also be registered on the Deny log as a DOS attempt.
About Learning
When a website is first created, the default security policy is signature based. As the Learner maps the website, the policy shifts toward a positive security model for specific applications. The Learner analyzes incoming static requests, web applications, and input parameters to build a complete profile of the website.
To avoid learning from worms, attacks, and other unauthorized access, the Learner employs a combination of heuristic attack classification, statistics, and server responses.
When learning is enabled for the website, the Learner works in asynchronous mode to process a queue of traffic samples between 10,000 and 200,000 requests each. For each sample processed, the Learner builds a trial policy, compares it to the former trial policy, and records the number of changes. Once the continuous processed samples result in no change between trials, the learned policy is stable enough to commit to the WAF.
If you plan to enable learning for a website, Alert Logic recommends a learning period before you run WAF in Protect mode. You can run WAF in Protect mode while learning, and doing so provides immediate protection. However, you run the risk of blocking friendly traffic if you start WAF in Protect mode without a learning period.
About the Websites page
The Websites page contains a list of all websites configured on your WAF appliance.
To open the Websites page:
-
In the Alert Logic console, click the Configure menu item, click WAF, and then click the Appliances tab.
- In the item row of your appliance, click Manage Appliance.
- On the Manage Appliance page, in the left navigation pane, under Services, click Websites.
The Websites list
Each website in the list is a proxy service that listens for incoming traffic for specific virtual host names (e.g. www.example.com). It then proxies it to the backend Real web server, which would typically be one or more web servers running in your VPC.

Blackhole
Blackhole is the first entry in the Websites list. WAF uses it to respond to requests for domain names that your other websites are not configured to listen to. WAF blocks and logs these requests in the Blackhole deny log of the website. This way of blocking requests for unknown host names automatically stops most attack probes from automated agents that traverse an entire IP range looking for vulnerable hosts.
Website proxies other than the Blackhole proxy can be configured to be the default website proxy for unknown host names. Doing so allows you to override the blocking from the Blackhole website proxy.
Websites list details
| Name | Description |
|---|---|
| ID | The ID for the website, also indicates the sequence number of added websites. |
| Name | The internal name you give your website proxy. |
| Deploy | The proxy deployment mode. For Amazon Web Services, only Reverse proxies are allowed. |
| Virtual web server | The domain name and port number combination for the website you want protected. |
| Listens to | The IP address bound to the virtual host. |
| Real web server | The domain name for your backend web server. |
| Mode | Blocking mode. You can select either Detect, Protect, or Pass mode. |
Selecting a Block mode
On the Websites list, you can select a Block mode for your website. Doing so determines how WAF monitors your website traffic.
Protect mode
Protect mode blocks and logs all violations according to the access policy.
Detect mode
In the default Detect mode preset, only logging occurs, and no blocking protection is activated. Blocking protection that would occur in Protect mode is logged and available for review in the deny log. Operating in the default detect preset is comparable to an intrusion detection system (IDS)—it detects and logs activities but does not protect or prevent policy violations.
When the WAF is first deployed in front of a production website, Alert Logic recommends the Detect mode while the initial tuning takes place. This is the default mode when you select the WAF configuration when you create the website.
Pass mode
In Pass mode, all requests are passed through the website proxy. No requests are blocked and no logging is performed. This mode is not configurable because no filters are active in this mode.