Get Started with Alert Logic Managed Web Application Firewall (WAF)
This document includes the following sections. Click on the link to go to the corresponding section to learn more:
To save configuration changes or edits you make to any features and options, you must click Save on the lower-right of the section or page where you are making changes. Click apply changes on the upper-left corner of the page, and then click OK. Your changes will not be stored if you do not properly save your changes.
To go to the next section, see DDoS and Resource Attacks Mitigation in Fortra WAF.
Connect to WAF from the Alert Logic console
If you need to connect more than one appliance, you must repeat the steps to connect to WAF for each appliance and access them individually in your browser to manage their corresponding websites and settings.
If you have more than one appliance already configured, you can log in through the Alert Logic console to see a lists all of your appliances, websites, and certificates which you can directly access.
To access WAF through the Alert Logic console:
- In the Alert Logic Managed Web Application Firewall (WAF) management login screen, click Log in at Alert Logic portal.
- In the Alert Logic console, enter your credentials.
- Click CONFIGURATION, and then click WAF.
- Click Manage Website. You can filter by appliance, or use the search bar to look for a website. To learn more about website configuration, see Services.
- If you want to access a websites by appliance, click Applianceon the left panel, and then click Manage Appliance. You can also use the filter to narrow your results, or use the search bar to look for a specific appliance or customer. To learn more about appliance configuration, see Services.
- If you want to access websites based on certificates, click CERTIFICATESon the left panel, and then click Manage Certificate. You can also use the filter to narrow your results, or use the search bar to look for a specific appliance or customer. To learn more about certificate configuration, see Configuration.
Navigating WAF management interface
After successful login, you will be presented with the management interface website overview page. The management interface is divided into four main sections:
- Dashboards: A quick overview of denied requests, traffic, system status and learning progression.
- Services: Configuration and management tool for all website proxies, including policy, caching, acceleration, load balancing, HTTP request throttling and DoS mitigation settings. To add a website or to select a website for management, click Services, and then click . For more information, see Website configuration .
- System: Configuration of system parameters like network interfaces, IP addresses, fail-over, network settings (DNS, NTP, SMTP), viewing of system logs and status information, including administration of updates, backup and configuration restore. Main (vertical) menu system is on the left side of the screen. Content assigned to the menu item is displayed on the right side of the screen. An additional horizontal menu system appears where applicable.
- Help: Access to help and support related information including documentation, version information and support links. On any page, click Help at the top menu to display the manual reference section specific for that page.

Basic system configuration
The table below has a list of system configuration tasks that must be completed. When you complete an item, it will be removed from the list in the WAF management interface. After you add your first website, the "read Quick Start Guide" item in the WAF management interface will also be removed.
| Enable inbound HTTP(s) traffic |
Select which network interfaces you want to respond to inbound HTTP/HTTPS requests from clients. |
| Configure Alert email |
WAF needs to know an SMTP server and an email address to send log warnings, update notifications, and other alerts. SMTP server: Enter the address of an SMTP server that is reachable and accepts SMTP requests from WAF. Contact email: Enter the email address to send notifications to. This item can be skipped, but it is recommended. |
| Configure DNS |
IP address of one or more DNS servers.
|
| Configure time synchronization |
IP address or host name of an NTP server. Remember to set up at least one DNS server if you enter a host name here.
|
Website configuration
To configure a website:
- In the left panel, under Services, click Websites.
- In the Websites page, click Add Website.
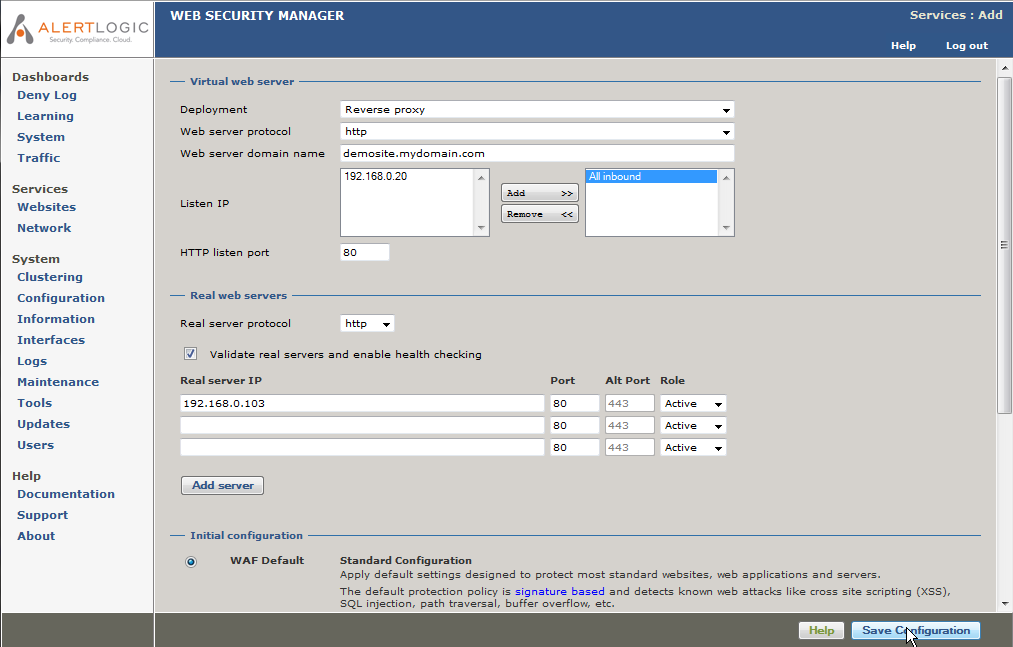
- In the Services Add page, on the Virtual web server section, you must complete the following steps to configure the part of the website proxy clients use for connecting:
- In Deployment field, select either Reverse proxy or Routing proxy.
For routing proxy deployments, make sure that IP forwarding is enabled in Services>Network>Network routing.Both deployments terminate client requests and proxies requests to the backend real server. While the reverse proxy requires an IP address to be configured on the WAF node, the routing proxy deployment routes traffic to the backend server, but intercepts traffic for the configured ports, processes it and proxies it to the backend.
- In Web server protocol field, select HTTP, HTTPS, or Both. The Both option creates a website proxy that responds to both HTTP and HTTPS requests. When selecting HTTPS or Both as the protocol, a temporary certificate will be generated. When the new proxy is created, the certificate can be replaced by importing the real certificate in Services>Websites>ADC>Virtual host. Click Help in that section to get instructions.
- In Web server domain name field, enter the address of the web server you want to protect. The address is you enter in the browser to go to the website.
- In Listen IP, select the IP address(es) you want the web server to respond to, and then click Add. For HTTP websites, all inbound/DHCP can be selected. This will configure the website proxy to respond to all IP addresses that are configured to accept inbound requests. For HTTPS proxies, you must select a specific IP address.
- In HTTP(s) listen port field, select the port(s) you want the website to listen to. For HTTP proxies, the default is 80, and for HTTPS proxies, the default is 443. When creating a website proxy that serves both HTTP and HTTPS, two input fields will appear.
- In Deployment field, select either Reverse proxy or Routing proxy.
For routing proxy deployments, make sure that IP forwarding is enabled in Services>Network>Network routing.
- In the Real web servers section, you must complete the following steps to configure how the website proxy communicates with the backend web servers:
- In Real server protocol drop-down option, select the protocol you want WAF to use when connecting to the backend web servers. If you want the traffic to the backend web servers to be encrypted, select HTTPS. Otherwise leave the default HTTP selected.
- Under Real server IP or public domain name, enter the address of the web server to which WAF will redirect the allowed client requests. This is the address of the web server you want to protect. In the example, 192.168.0.103 is entered. Only select HTTPS if it is necessary. HTTPS puts an extra burden on the backend web servers.
- Select Validate real servers to enable WAF to connect to the backend servers automatically, and find a suitable target page to use for health checking. If Validate real servers is disabled, WAF will not monitor the backend server status.
- For each backend web server that is serving the website (demosite.mydomain.com in this example), enter the IP address and port
in the real servers list.
- Real server IP or public domain name: The IP address the web server is listening on.
- Port: The port the web server is listening on. Typically Address:80 for HTTP servers and Address:443 for HTTPS servers.
- Role: Select Active, Backup or Down.
- Active means that requests is forwarded to the server.
- Backup means the server is only used if no active servers are in operation.
- Down means that the server should not be used, for instance if it is down for maintenance.
- In the Initial configuration section, select the WAF Default to apply to the website proxy.
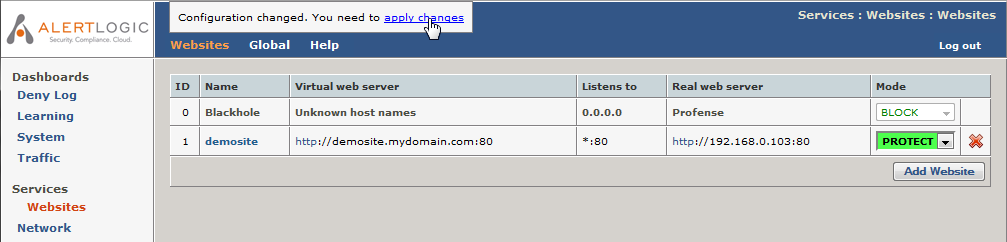
- In the lower right corner of the page, click the Save Configuration. This will save your configurations and take you back to the Websites Overview page.
- Click the apply changes that appears in the upper right corner of the page to apply changes to your configuration of WAF.
Test your website
You can now test your newly configured website.
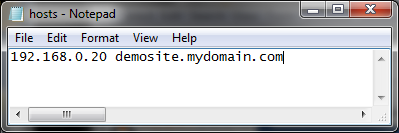
Change the DNS for the website
For testing purposes, make sure the website domain name resolves to the WAF IP address. You can do this by adding the IP address and domain name to the hosts file on your PC.
Test connectivity
In a new page or tab, enter the address of the website you configured. You should see the home page of the website, and it should be served by WAF. To check that WAF is serving the content, enter an URL that will match an attack signature. For instance, to match the path traversal signature append the parameter print=../../../etc/somefile to a page like the example below.
http://demosite.mydomain.com/testpage.php?print=../../../etc/somefile
If the page is served through WAF and in Protect Mode, you see the message below with a unique reference ID:
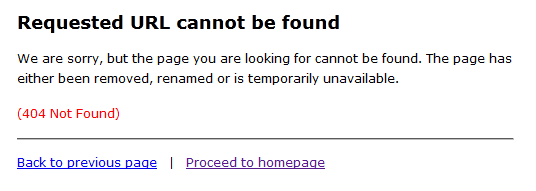
If the proxy is in Detect Mode, there will be no block page, but you will be able to view the allowed test request and other deny logs in the Alert Logic console.
If the above is not displayed, restart your browser and/or flush your DNS cache by running cmd.exe on your PC, and then enter ipconfig /flushdns. Try the request again.
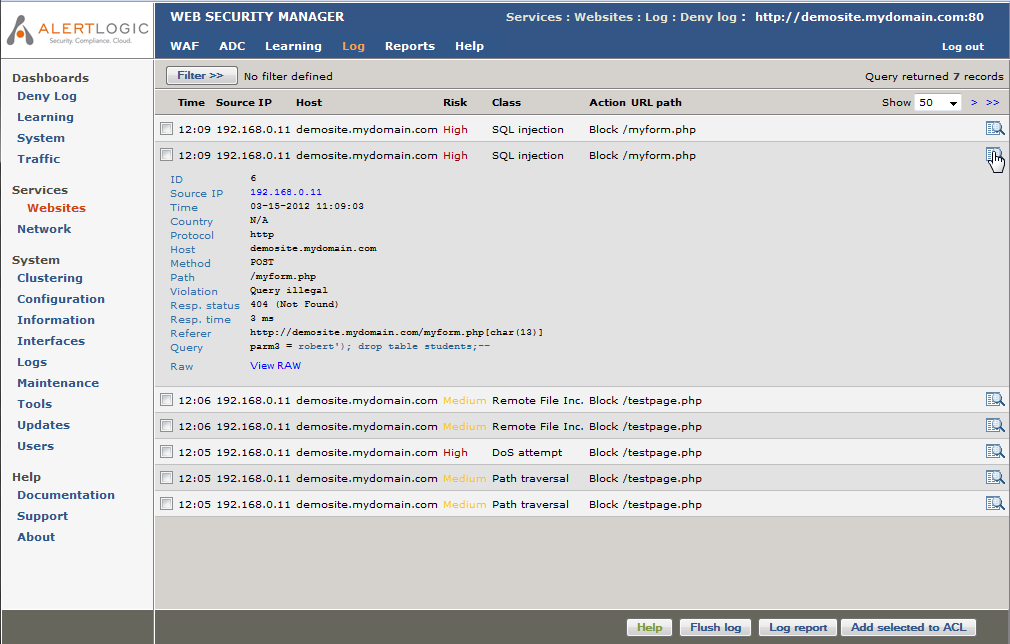
View the website deny log
In the WAF management interface, on the left panel, under Dashboards, click . The websites overview page will be displayed. Select the website for which you want to view the deny log.
When you select a website, landing page is the Deny Log. To view details of a log entry, click the details icon ( ) in the right column of the list.
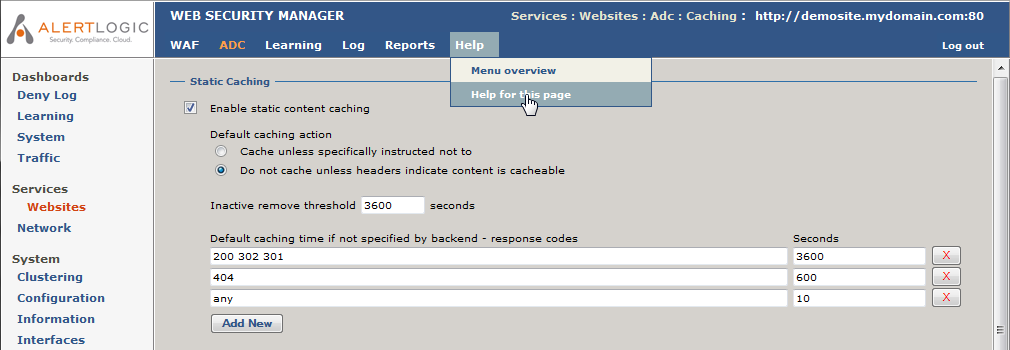
Getting help
Click Help in the relevant section you want more information on, and then click Help for this page to open in a new window.