Add a Website
When you access the Managed WAFinterface for the first time, you must add your websites to be protected.
To add a website to the WAF:
- In the Alert Logic console, click navigation menu (
 ) > Configure > WAF, and then click the Appliances tab.
 - In the item row of your appliance, click the appliance name.
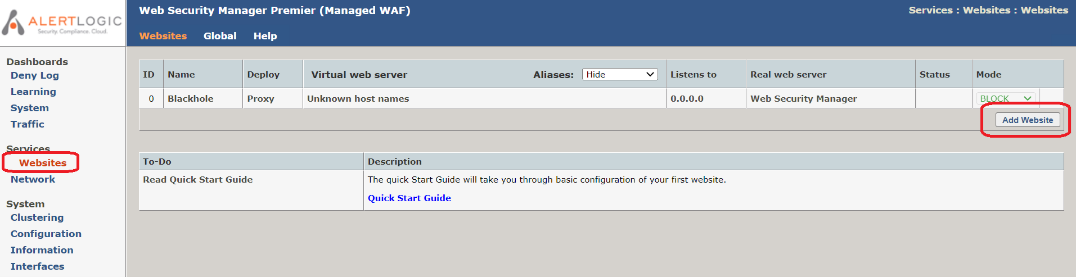
- In the Managed WAFconsole, click Websites, and then click Add Website.
- Complete the Add Website screen.
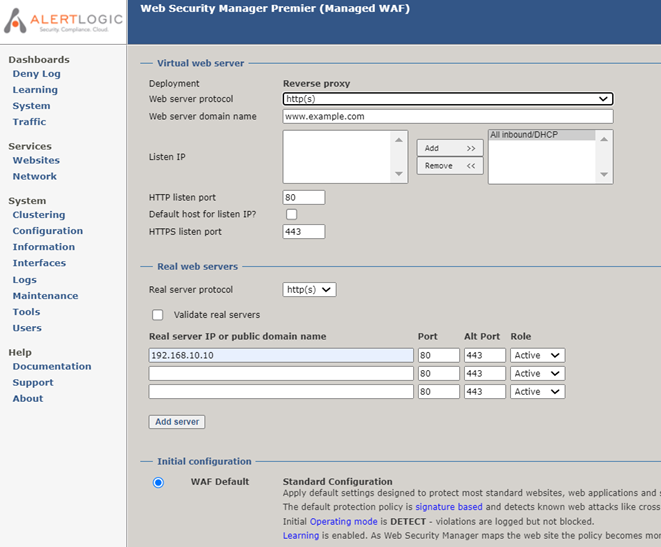
- Deployment (if applicable): Select either Reverse Proxy or Routing Proxy. Please contact Alert Logic support if you have any questions about which Deployment method to select.
- Web server protocol: Select the protocol to listen for (http, https, or both http(s)). If there is an HTTP-to-HTTPS redirect on the backend web server (Real server), then both http(s) should be selected.
- Web server domain name: Enter the primary Fully Qualified Domain Name (FQDN) for this website. You can add additional alias FQDNs as “Virtual host alias”. Click Configure Virtual Host Alias to learn how to do this.
- Listen IP: For most deployments, select All inbound/DHCP and click Add.
- HTTP listen port (if applicable): Enter the appropriate TCP port (default 80) to listen for HTTP traffic.
- HTTPS listen port (if applicable): Enter the appropriate TCP port (default 443) to listen for HTTPS traffic.
- Real server protocol: For most websites, you should select the same protocol option as Web server protocol above. Please contact Alert Logic support if you have any questions about configuring other protocol options.
- Validate real servers: Clear this check box. When checked, the WAF will perform an HTTP Head against the Real server. The Real server must return an HTTP 200 response code on the default landing page “/” or the website would not be added.
- Real server IP or public domain name: Enter the backend web server (Real server) IP address or DNS name. If you use a DNS name, the DNS name must be resolvable by the WAF.
If Real server protocol is set to http:
Port: Enter the appropriate TCP port (default 80) to send HTTP traffic to the backend web server (Real server)
-or-
If Real server protocol is set to https:
Port: Enter the appropriate TCP port (default 443) to send HTTPS traffic to the backend web server (Real server)
-or-
If Real server protocol is set to both http(s):
Port: Enter the appropriate TCP port (default 80) to send HTTP traffic to the backend web server (Real server)
Alt Port: Enter the appropriate TCP port (default 443) to send HTTPS traffic to the backend web server (Real server) - Under the Initial configuration section, leave WAF Default selected.
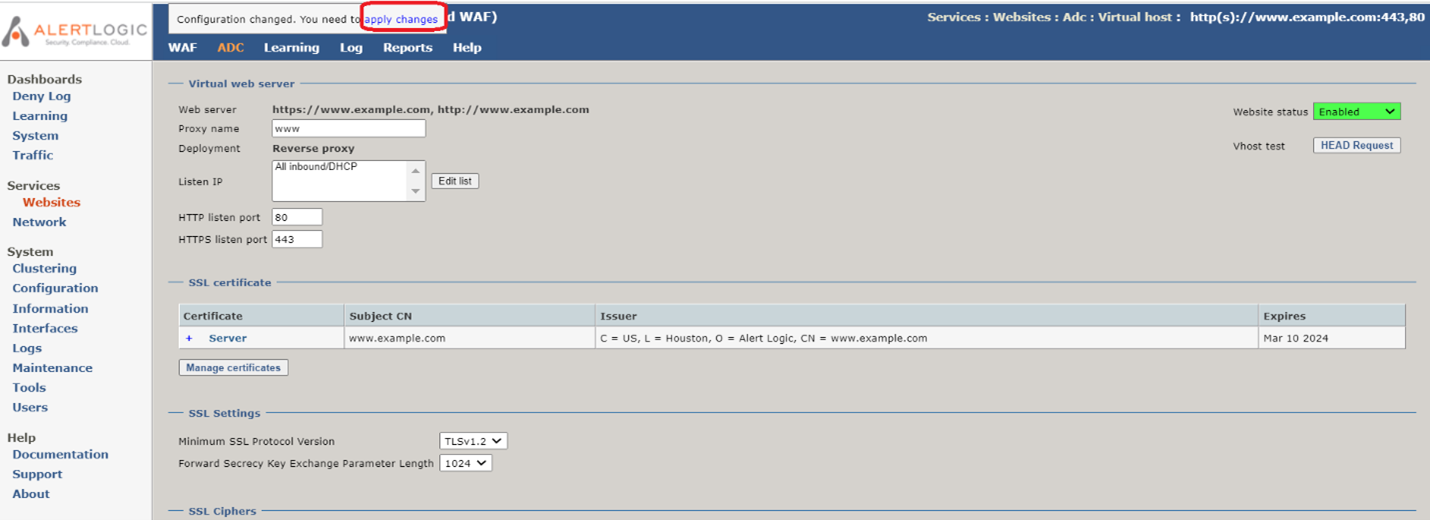
- Click Save Configuration. The Websites screen displays.
- To commit your changes, click apply changes at the top of the screen. When prompted “Are you sure you want to apply the changes to the running configuration?”, click OK.