Migrate to Fortra VM for PCI ASV Scanning
Alert Logic Managed Detection and Response (MDR) and Cloud Defender customers were migrated to the self-service PCI ASV capabilities available in Fortra VM, including external network scanning, web application scanning (WAS), PCI disputes, and PCI reports.
The migration process was designed to be straightforward and effortless. Your "External - PCI" scan policies in the Alert Logic console were transferred over to Fortra VM if the status was enabled or was disabled but had run during the previous 90 days. Also, the schedule status and most settings (scan targets, frequency, start time, time zone) were retained.
You must still ensure that your users register credentials with the Fortra Identity Provider (FIDP) for secure authentication to the Alert Logic console and Fortra VM.
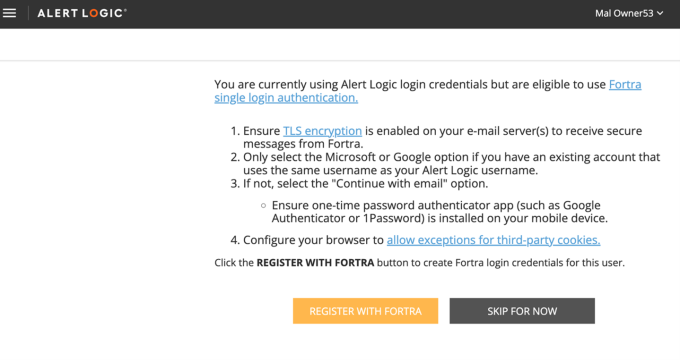
After each successful login to the Alert Logic console, users will be presented with the option to REGISTER WITH FORTRA and proceed to walk through the process of registering FIDP credentials.
Alternatively, users can navigate to the PCI Scanning (Archive) or PCI Scan Disputes (Archive) pages in the Alert Logic console where they will see a banner at the top of the page.

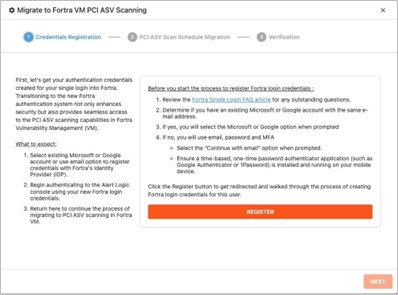
After selecting the “click here” link, a wizard is presented to guide you through the following three steps:
Read on to learn more about each step of the process.
Alert Logic has automatically completed Step 2 and Step 3 for your account, but your users still must complete Step 1 to access Fortra VM.
Step 1: Credentials Registration
This first step is only required for users that need access to PCI ASV features in Fortra VM for your account. For information on Fortra single login and identity provider, refer to this FAQ article.
You will need to ensure TLS is enabled on your email server(s) to receive the secure messages required to register credentials with FIDP. For more information on TLS email encryption, refer to this document.
To register your Fortra credentials:
- Click REGISTER to walk through the process of registering FIDP credentials.
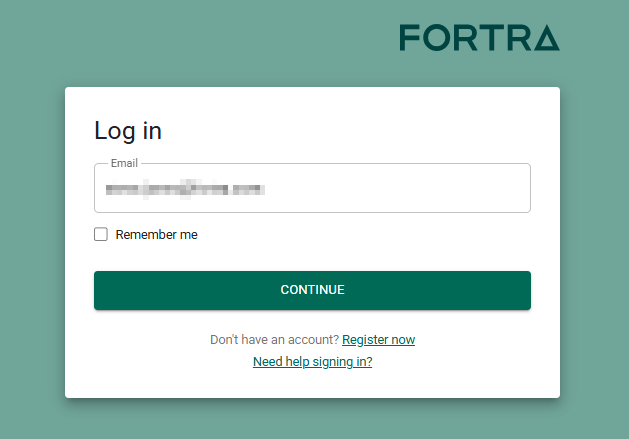
- On the Fortra Log in prompt, enter your email address and then click Continue.
- Select the appropriate option at the Fortra Log in prompt.
- Click Continue with Microsoft or Continue with Google if your Microsoft or Google account uses the same username as your Alert Logic username. With this one-click login option, the existing credentials are registered with FIDP, and multi-factor authentication (MFA) is not required. Proceed to Step 2: PCI ASV Scan Schedule Migration.
- Click Continue with email to set up your credentials and MFA to ensure the account remains protected. Proceed to the next step.
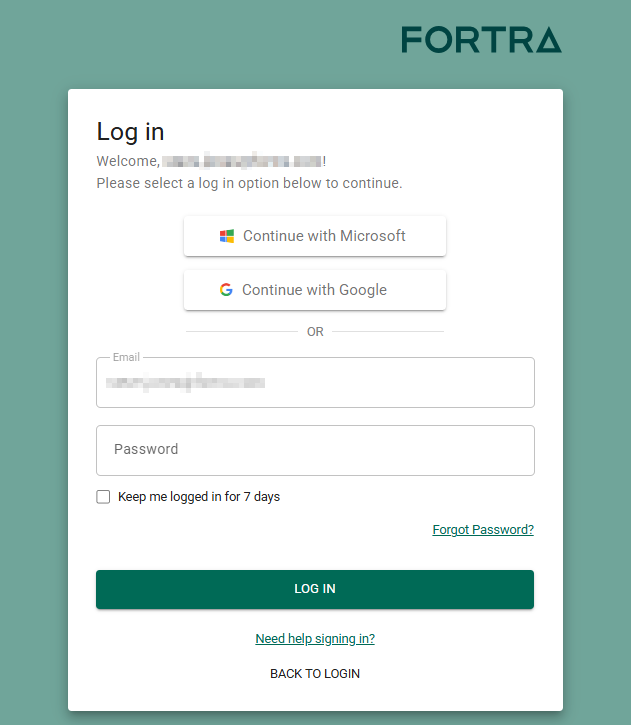
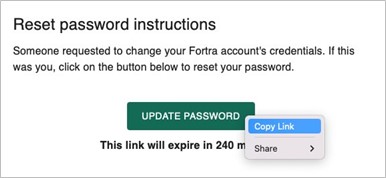
- Click Forgot Password? and follow the prompts. You will receive an email from Fortra with instructions for resetting your password.
- Click UPDATE PASSWORD in the email or copy the link and paste it in your browser. This action must be performed within four hours of receiving the email. The Mobile Authenticator Setup window displays.
- Follow the instructions and enter the one-time code from your authenticator application.
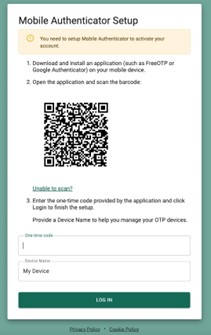
- Click LOG IN. A Create new password prompt displays.
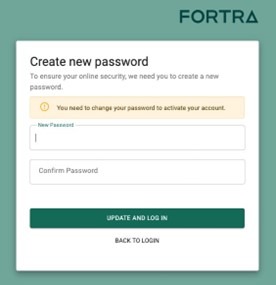
- Enter and confirm the new password for your Fortra login, and then click UPDATE AND LOG IN. Passwords must be 12 - 256 characters in length and contain at least one uppercase, lowercase, digit and special character (!~@#$%^&*()-_=+<>?/\;:[]{},.)
- Log in to the Alert Logic console with your Fortra credentials.
Users will need to allow exceptions for third-party cookies in their browsers. For instructions for each browser, refer to this knowledge base article.
Step 2: PCI ASV Scan Schedule Migration
This step was completed for your account by Alert Logic. For information on PCI ASV scanning migration, refer to this FAQ article.
The process to migrate your active PCI scan schedules to Fortra VM included the following items:
- All PCI scan schedules that are enabled will be migrated.
- Only disabled PCI scan schedules that have run in the last 90 days will be migrated.
- Scan status and setting (such as target, intervals, start times and time zones) are retained.
- The migrated PCI scan schedules appear as scan groups in Fortra VM.
Once the migration is complete, an updated status message is displayed on the wizard. In addition, all PCI ASV scan schedules in the Alert Logic console are disabled as a precaution to prevent duplicate or unexpected scanning. 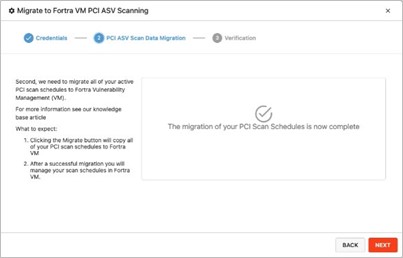
Click NEXT to proceed with Step 3: Verification.
Step 3: Verification
This step confirms that the PCI ASV migration has been completed for the account.
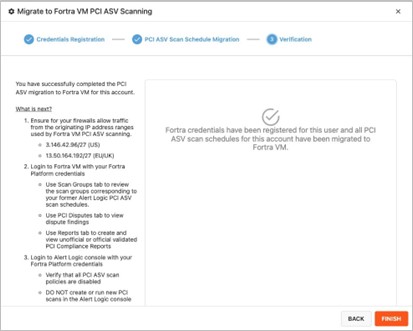
To verify the migration:
- Once you click NEXT after the migration, an updated status message displays on the wizard.
- Review the next steps listed and follow the steps as needed.
- Click FINISH to close the wizard.
You must ensure your firewall(s) allow traffic from the originating IP address ranges used by Fortra VM PCI ASV scanning:
-
US = 3.146.42.96/27
-
EU/UK = 13.50.164.192/27
Post Migration
Moving forward, you must authenticate using your FIDP credentials to have seamless access to both the Alert Logic console and the Fortra VM console. The main navigation menu in the Alert Logic console has been updated to redirect you to the PCI ASV features in the Fortra VM console or provide access to archived PCI Scanning and Disputes pages in the Alert Logic console.
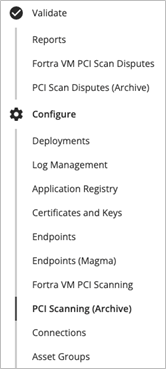
The new menu items function as follows:
- Navigate to
 > Configure > Fortra VM PCI Scanning
- You are redirected to the Scan Groups page in Fortra VM.
- The PCI ASV scan schedules that were migrated from Alert Logic can be found on this page.
- Navigate to > Validate > Fortra VM PCI Scan Disputes
- You are redirected to the PCI Scan Disputes page in Fortra VM.
- Navigate to > Configure > PCI Scanning (Archive)
- You can access historical data from previous PCI ASV scans and reports.
- Navigate to > Validate > PCI Scan Disputes (Archive)
- You can access historical data from previous PCI scan disputes.
After the migration, DO NOT run or create new PCI ASV scan in the Alert Logic console.
Also, an updated banner is presented on the PCI Scanning (Archive) and PCI Scan Disputes (Archive) pages in the Alert Logic console.

You can click the “Fortra VM PCI Scanning” link in the banner to be redirected to the landing page in Fortra VM. For information on Fortra VM PCI scanning features, refer to the Fortra VM PCI ASV Guide for Alert Logic Customers.
Additional resources
Learn more about registering Fortra credentials and migrating to Fortra VM with the following articles: