Change the IP Address of a Physical Appliance
Alert Logic ships appliances with a preconfigured network IP address. If you need to add or update an appliance IP address, you must use the network configuration utility Alert Logic provides for this purpose.
To access the network configuration utility on the appliance, you must connect either of the following devices to the appliance:
- A USB keyboard and monitor connected to a USB connector and the VGA connector on the appliance.
- An IP-based KVM attached to the appliance.
To configure the network:
- Turn on the appliance.
- At the login prompt, use the login name setup and the password provided by Alert Logic.
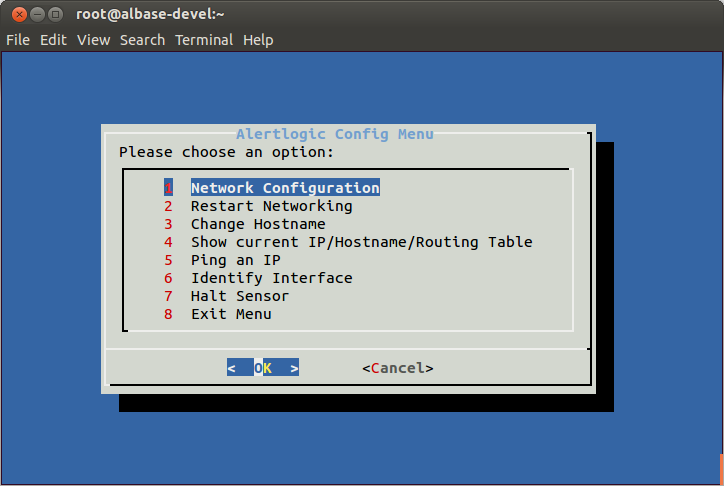
- In the Configuration Utility, select Network Configuration, and then press Enter.
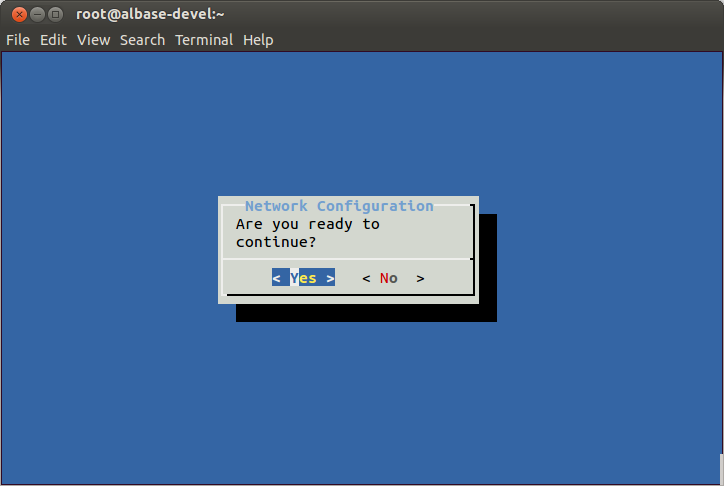
- Review the instructions, and then press Enter.

- Press Enter to continue.
- On the Interfaces screen, press Enter to continue.
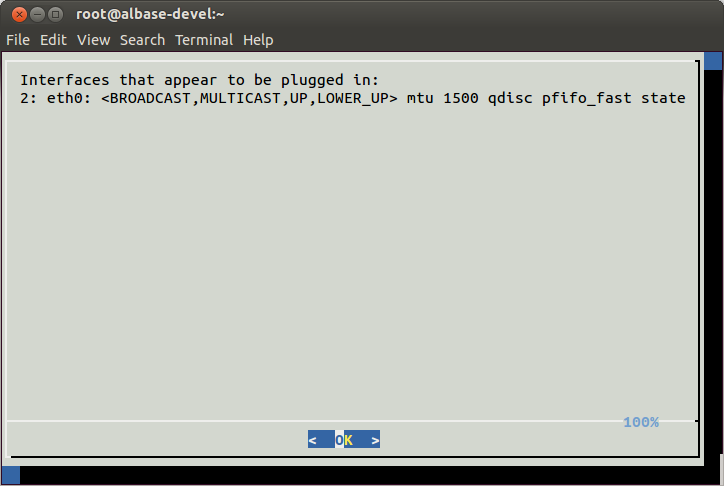
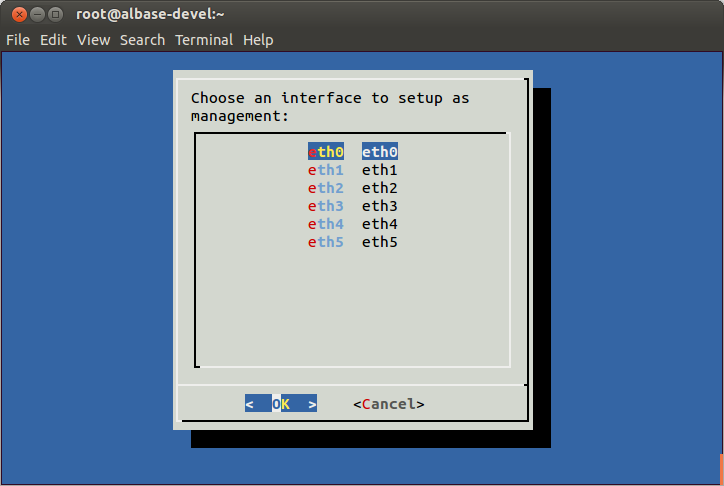
The Interfaces screen displays the connected interfaces. Typically, eth0 is the management interface as designated on the back of the sensor. However, other configurations could require management on a different interface.
- Select the desired management interface, and then press Enter.
- Provide the IP address default gateway and subnet mask. Use the arrow keys to switch between fields.
Optional: Provide two DNS server IPs that the appliance can use instead of the default Google DNS servers.
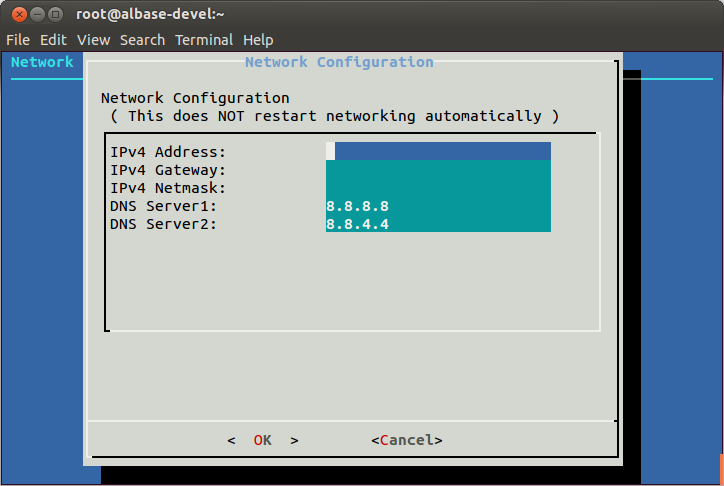
- Press Enter.
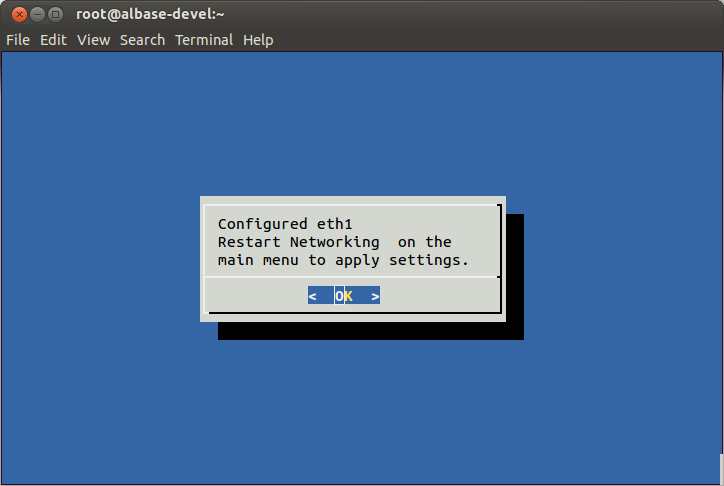
- Press Enter to confirm configuration.
-
Reconnect any network cables that you previously disconnected.
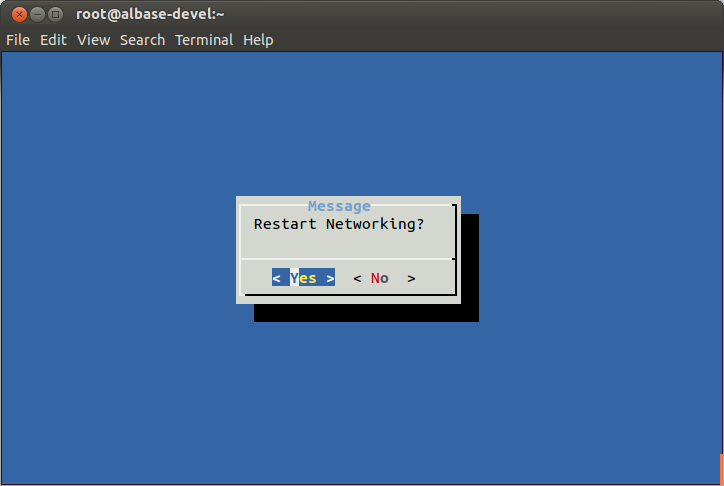
To apply network changes:
- From the Main Menu, select Restart Networking, and then press Enter to apply the configuration changes performed in the previous section.
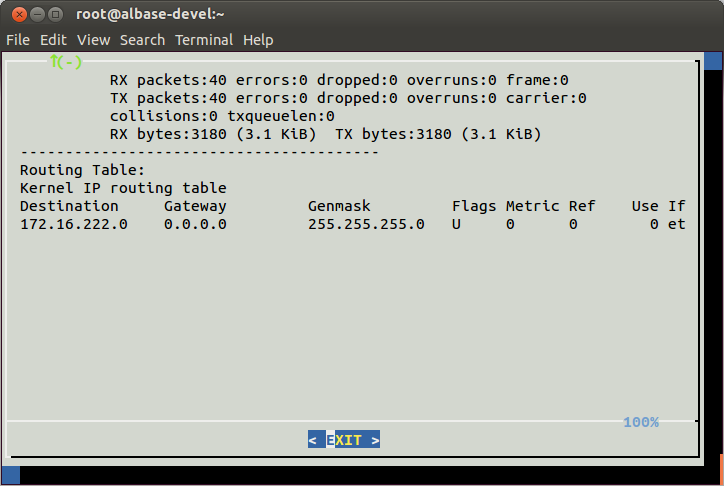
- Select Show Current IP/Hostname/Routing Table to see the changed interface and IP configuration.
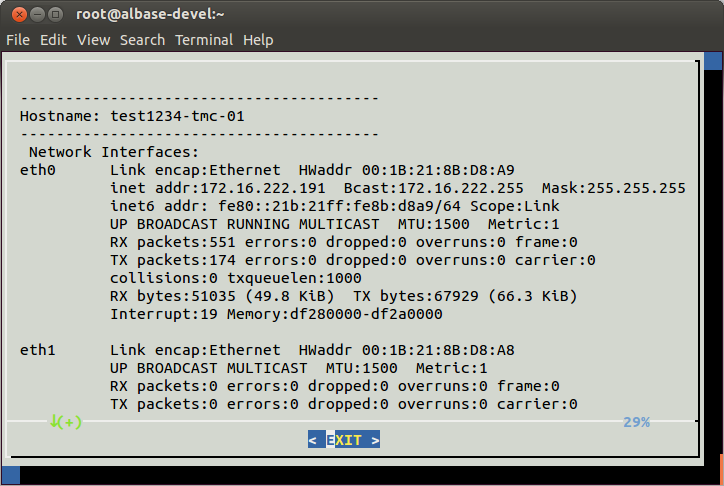
The configured Default Gateway appears with a destination of 0.0.0.0, a flag of UG, and your enterprise default gateway.
You can contact Alert Logic to verify connectivity with the appliance. The appliance should be reachable on your local network.
Confirm communication ability:
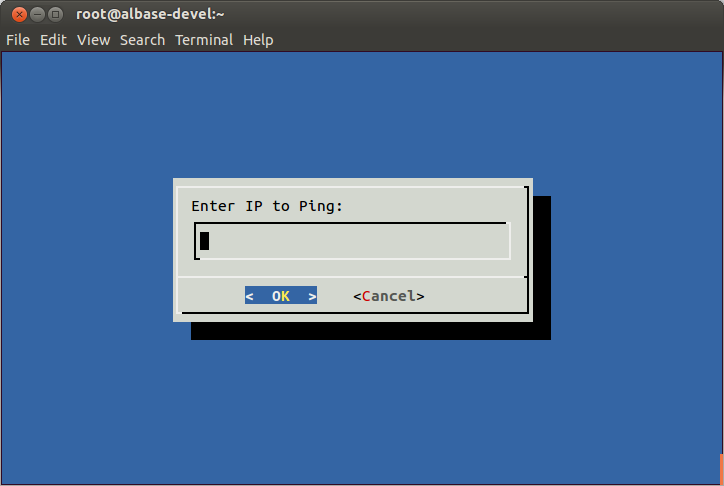
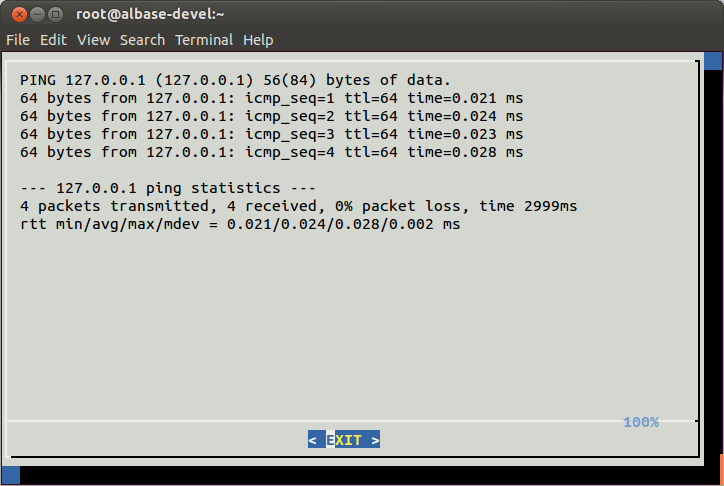
You can perform this optional procedure to verify the physical appliance can communicate with other IP addresses.
- From the main menu, select Ping an IP, and then press Enter.
- Provide an IP address in the form provided, and then press Enter.
- After you verify communication with the IP address, press Enter.
Identify Interfaces
The Identify Interfaces tool flashes the Link LED of a selected detected interface to assist you with cabling and connections.
To identify interfaces:
- From the Main Menu, select Identify Interface, review the instructions, and then press Enter.

- To continue, press Enter.

- Select the interface to identify, and then press Enter.